Frequently Asked Questions

Homeowners FAQs

How to access my FRONTSTEPS account?

Tips for finding your FRONTSTEPS Community, Caliber, AssociationVoice, or AtHomeNet, homeowners portal. 

FRONTSTEPS offers multiple homeowner portals that help members of associations stay informed and efficiently manage tasks like booking amenities, paying assessments, and submitting maintenance requests. If you live in a community with a FRONTSTEPS product and need help finding or creating your account, navigate to the correct product for tips on getting started. Click here to get started.

How can I make a payment quickly without registering or logging in?

To make a payment, you can either log in to your community portal, or you can use your community’s Quick Pay. If you are in a hurry, Quick Pay may be the best option for you, but don’t forget to take advantage of your community portal! The portal will simplify every part of living in your community and keep you connected. 

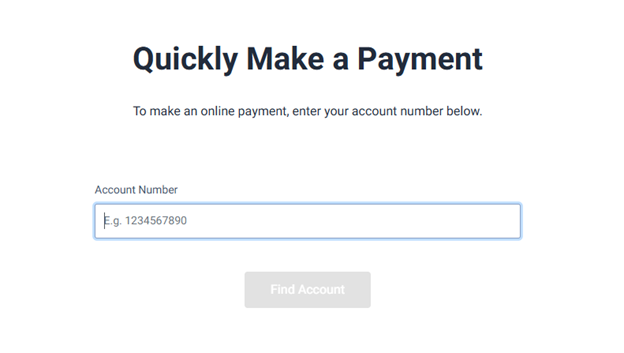
To make a payment through Quick Pay, please follow these easy steps: 

  1. Enter your account number.
  2. Select your name and address.
  3. Enter the email address you wish to receive your payment receipt.
  4. Add your payment method if you do not already have one set up.
  5. Select “Make Payment”.
  6. Choose to pay the full amount owed or enter a specific amount.
  7. Select “Submit”.

Quick Pay links all begin with https://quickpay.frontsteps.com and will have the following appearance: 

quick pay image

How do I find my account number?

Your account number will be included in your statements or payment coupons from your community and are typically located in the top-right corner. If your account number appears to be missing, we would be happy to try to find that for you, or your community management team can help. 

How do I register for the FRONTSTEPS Community Portal?

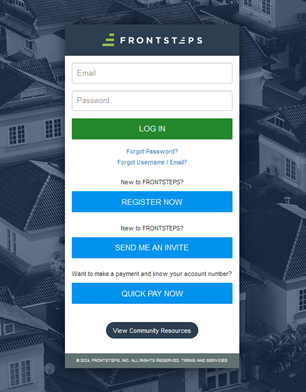
You can register for your community portal by accepting the invitation that was sent to your email by your community management team, or by using the self-registration form. 

**If you are not able sign up using the self-registration form, please look in your inbox or spam folder of your email. 

community login

How do I add, edit, or remove a scheduled payment?

To add, edit, or remove a scheduled payment, please follow these steps: 

  1. Log in to your community portal.
  2. Click “Make Payment”.
  3. Select the unit the payment is or will be tied to.
  4. Click “Continue to Payment”.

This will take you to the main payment screen, where you will have the option to make a payment, update an existing scheduled payment, and update your payment methods. Your payment can be a one-time or recurring payment based on the frequency you choose.  

Are you interested in step-by-step guides covering the process? Click here! 

What if my balance owed is incorrect, I need a refund, or I have a payment dispute?

If you have a payment dispute or notice any discrepancies in your ledger, please contact your community management team. They will have the necessary information to assist you. 

What should I do if I have an issue within my physical community?

The FRONTSTEPS Community portal allows you to submit work orders and architectural requests directly to your community manager. 

To access either of these features, please log in to your community portal using the community-specific link found at the bottom of email communications sent from your community, then click on MY RESERVATIONS & REQUESTS, then click on the appropriate feature. 

How do I download and log into the CAM App?

Download the FRONTSTEPS Community Manager app from the Google or Apple app store. You may use the links below to install the app.  

FRONTSTEPS Community

How do I find my portal site?

Each association using FRONTSTEPS Community has a unique web address (URL) that generally takes the following form: [communityname.frontsteps.com].  

If you don’t know your portal URL, try tracking it down by: 

  • Check your email inbox. Residents with email addresses on file receive invitation emails once per week for 5 weeks after FRONTSTEPS Community is set up. Search for an email sent by notifications@frontsteps.com or with the subject line “Management Company has invited you to join [Community Name] portal” to find your message. (Your email account may have filed the messages into a ‘promotional’ or ‘junk’ folder.)  
  • Visit your management company’s website. Does your community work with a management company? If so, you may be able to find the link to your community portal on their website. 
  • Visit your community association’s website. A link to your homeowner portal is often available from that site.  
  • Contact our Resident Support team. Still having trouble? Fill out this short form and a member of our team will reach out soon to help you get started. 

How do I create an account?

The first time you use FRONTSTEPS Community you will be asked to create an account. (Please note, you need to create an account online before downloading and using the mobile app.)
There are several ways to get set up, including:  

  • Follow the link from your invitation email.  
  • Contact your community manager.  
  • Contact our Resident Support team.  

Learning about account features

To learn more about your account features and how to use the FRONTSTEPS platform: 

  • Visit the FRONTSTEPS Knowledge Base:
    https://kb.frontsteps.com/s/ 
  • Select the Product You Are Using: 
    • Choose the specific FRONTSTEPS product you want to learn more about. 
  • Browse or Search for Resident Resources: 
    • You can explore helpful articles, how-to guides, and FAQs. 
  • Use the search bar to find specific information quickly. 
community login

FRONTSTEPS Caliber

How do I register for the Caliber portal?

The Caliber Portal is accessible through links specific to your community association or management company. Follow these steps to register: 

1. Access the Correct Portal Link

Your portal link depends on your community or management company. 

Examples: 

  • Community-specific link:
    https://silverthroneheights.frontsteps.com/users/sign_in 
  • Management company link:
    https://app.frontsteps.com/login?company_uuid=836db04b-cb0e-4828-98ac-2ebaa55cb073 

If you don’t know your portal link, contact your association or management company to obtain it. 

2. Click “Create Login” 
  • Located below the Login button on the portal page. 
3. Enter Your Information 
  • Provide the required details, such as: 
    • Full name 
    • Property address or unit number 
    • Email address 
    • Other information your association may require 
4. Submit Your Registration 
  • Click the “Submit Registration” button after filling out the form. 
5. Check Your Email
  • You’ll receive an email with a link to complete your account setup. 

Follow the instructions to create your login credentials (username and password). 
 

How do I find my portal site?

Each association using FRONTSTEPS Caliber portals has a unique web address (URL). Contact your management company to locate your login. Some management companies will also have links from their public website to help community residents sign into their portal account. 

How do I create my account?

To create your account, follow the step-by-step instructions published in the FRONTSTEPS Knowledge Base: 
Caliber Portal Registration Guide

How do I run statements?

You can generate your account statements by following these steps:

  • Log in to your Caliber Portal. 
  • Navigate to the Statements or Account Summary section. 
  • Select the date range or options provided. 
  • Click Run Statement or Download PDF, depending on your portal layout. 

Detailed Guide: Running Statements 

Learning about account features

To learn more about the features available in your Caliber Portal, visit the Caliber Portals section of the FRONTSTEPS Knowledge Base: Caliber Portals Knowledge Base 

Here you can browse helpful articles, how-to guides, and FAQs designed to help you get the most out of your portal experience. 

FRONTSTEPS Dwelling

How do I access my site?

Homeowners with FRONTSTEPS Dwelling (Previously DwellingLIVE) security software can access their account online here:FRONTSTEPS Dwelling Homepage 

Some communities may have custom log-in pages for their residents. Please reach out to your community admin directly if you cannot gain access with the link above.

How do I create my account?

To create your Dwelling account, follow the step-by-step instructions published in the FRONTSTEPS Knowledge Base: 

  • Registering a New Dwelling Account
    (Note: This link directs to the general portal registration guide—confirm with your association if this applies to your Dwelling account.) 

How do I reset my password?

You can reset one or all of your DwellingLIVE passwords at the same time. 

  1. Access the Login page at community.dwellinglive.com.
  2. Select the Forgot Password link.  The Forgot Password Recovery screen will display.
  3. Enter your email address in the Email field. Select Submit.
    • The “A reset password link will be sent to you by email” message displays after your request is submitted.
  4. The email contains a reset link for each account
    • If you have multiple accounts a link to reset all accounts will be in the email
  5. You will be redirected to the Password Reset screen for the selected Login
  6. Enter and Confirm the new password

If you do not reset your password within the required time period (15 minutes), when you select the reset link from the email, you will be directed to the Password Reset screen, where the following message will be displayed “Your Reset Link is expired or is invalid. Click here if you need a new link.”

How do I send E-passes (QR Codes) via text?

From your  Guest Management page, select Guest List.

  1. Select Add Guest.
  2. Select Pass Type 
  3. Complete the required Guest information 
  4. In the Text This Pass section, click or tap the toggle that is located next to the word “Text” to the right. The toggle displays in green. 
  5. Enter the recipient’s mobile telephone information in the Phone Number field.
  6. Select Save.  

On the resulting Confirmation Page, ensure the details are correct and select Send. 

Linking Dwelling accounts for multiple properties

You’ll just need to make the email and password you currently use for each log in the same. You can change the email and password associated by logging in to community.dwellinglive.com >

  1. Click “my account” in the top right corner >
  2. Click “edit” next to your profile > enter the email, password and confirm new password >
  3. Click “save” in the bottom right corner.
    • Once you have made both accounts the same, you can log out, log back in and you will be asked which account you would like to manage upon signing in and can toggle between the two by clicking “change account“. 

How do I manage pass types?

The Pass Types feature allows communities to set guest access parameters and determine who has permission to issue and edit guest passes. Pass types are manageable by Community Administrators, Attendant Supervisors, and Dealers. 

Steps 

 1.    Log into community.dwellinglive.com.   

 2.    Select Pass Types from the Visitor Management drop-down menu.
3.    To add a new pass type, select “Add Pass Type” in the upper right corner of the page. 

  • To edit an existing pass type, select “Edit” to the right of that pass type.

4.    Start by entering basic information such as Name, Short Text and Pass Footer Notes. 

  • Name – the type of guest the pass will be issued to. 
  • Short Text – summary or other important information about the pass. 
  • Pass Footer Notes - additional information such as the community speed limit or pass placement directions. This information will appear on passes issued to guests.

5.    Under Allowed Entry Schedule decide the days and times a pass will allow entry into the community. Select days by checking the boxes next to the days of the week, then use the drop-downs to set the times.

6.    Below the schedule set the amount of times passes of this type are allowed entry into the community by using the Max Entries Per Pass Per Day drop-down. 

7.    Choose to Enforce Anti-Passback by checking the box to the left. This is an optional setting that, if enabled, will deactivate previously printed passes when a new pass is printed.

8.    Next, use the drop-downs under Perm. Guests and Temp. Guests to set the Guest Max Duration and Pass Duration. 

  • Guest Max Duration – number of days a guest is permitted on the property. A guest record will expire at the end of this time frame. 
  • Pass Duration – length of time the pass will be valid. This value cannot exceed the guest duration. Please note that the Pass Duration begins the day the pass is issued. 

9.    If the community charges a fee for guest passes, then change Do you charge a fee for each pass printed? from “No Charge” to “Yes”.  Enter any dollar amount in the “Yes” box.

10.  Decided who can add/edit the guests of this pass type on guest lists by selecting the following: 

  • Guests Editable by Attendants – allows gate attendants to add a pass of this type, as well as edit information on an existing pass of this type. 
  • Guest Editable by Residents – allows residents to add a pass of this type, as well as edit information on an existing pass of this type. 

11.  Lastly, decide whether a barcode and/or entry code should appear on the pass by selecting the following: 

  • Remove barcode on printer pass – if checked, a barcode will not be printed on the pass. 
  • Remove entry code on printed pass – if checked, an entry code will not be printed on the pass.

12.  Select “Save” at the bottom of the page when complete. 
Adding a New Credentialled Access Device

  1. Log in as a dealer or admin
  2. From the Main Menu choose Credentials Access > Access Devices
  3. On the Access Device page, on the top left of the page click on ‘Add Device’
  4. Choose the Add Multiple option
  5. Enter the Facility Code, Starting Number and Ending Number of the Credential block.
  6. Choose a device type, Active On date
  7. Set ‘Assign From”: Unassigned
  8. Choose Access level
  9. Click Save

This may take a few moments to complete. Once completed, you will see all of the devices in the number block listed on the Access Device page as Unassigned. 

Managing Access Levels

An access level determines who has access to an area and when they have access to it. Access levels are created by combining door groups and schedules. Before an access level can be defined, schedules and door groups must be created.  

A door group is a set of access points where entry is permitted. The schedule determines the time frame in which access will be granted. Access levels can be created by Dealers and Community Administrators only. 

  • Note: Access levels should be created prior to the addition of access devices.

Steps 

Create/Edit Schedules 

  1. Log into community.dwellinglive.com as a Community Administrator or Dealer. 
  2. Select Access Levels from the Credentialed Access drop-down menu.
  3. Select “Add Schedule” in the upper right corner.  To make changes to an existing schedule, select “Edit” to the right of that schedule.
  4. The Add Schedule pop-up will appear where the schedule name and a description (optional) must be entered.
  5. Select “Save” to reveal the schedule building drop-downs.
  6. Use the drop-downs to set day, start time, and end time, then select “Add” to attach them to the schedule.  Repeat this step until preferred days and times have been set.
  7. When the schedule is complete, select “Save”. Create/Edit Door Groups:
  8. Back on the main Access Level page select “Add Door Group” in the upper right corner of the page.  To make changes to an existing door group, select “Edit” to the right of that door group.
  9. Enter a name and description (optional) into the Add Door Group pop-up window.
  10. Below the name and description will be a list of readers and door/gate locations. Select the check box to the right of each location to be added to the door group.
  11. Select “Save” after all preferred doors have been chosen. 

Create/Edit Access Levels: 

12.  Select “Add Access Level” in the upper right corner of the Access Levels page.  To make changes to an existing access level, select “Edit” to the right of that access level.

13.  Enter the Access level name and a description(optional), then select “Save”.
14.  Select “Edit” to the right of the newly created access level. 

15.  Use the drop-downs to select a door group and schedule, then select “Add” to attach them to the access level.

  • Note: More than one door group or schedule may be assigned to an access level. Do not assign overlapping door groups and schedules, as this will cause permission issues.

16.    When the access level is complete, select “Save”. 

AssociationVoice & AtHomeNet

How do I find my portal site?

Each association using AssociationVoice & AtHomeNet portals has a unique web address (URL). Contact your management company to locate your login. Some management companies will also have links from their public website to help community residents sign into their portal account.  

  • If you live in a self-managed HOA or COA, contact a member of your association board for instructions on accessing your account. You may also find a login link on your association’s public website. 

How do I create my account?

Account access is directly granted to residents by community managers 

  • You can request a login directly through your community’s AtHomeNet website here. – https://support.frontsteps.com/athomenet/s/article/request-login-account 
  • To sign up for your community’s AssociationVoice website, please follow the instructions here. – https://support.frontsteps.com/AssociationVoice/s/article/sign-up-for-an-account 
  • If you do not have your account information, please reach out to your community management team directly. 

Learning about account features

Visit the AssociationVoice and AtHomeNet sections of the FRONTSTEPS Knowledge Base.

  • AssociationVoice information is found here.
  • AtHomeNet information is found here. 

HARDWARE PROCUREMENT FAQS

What is the best method for submitting an order?

For HOAs and management companies: submit through the order center in DwellingLIVE (aka FRONTSTEPS Dwelling).

For security dealers and installers ordering on behalf of their clients: Submit through secorders@frontsteps.com with the following details:

  • Product Item Number
  • Description of Product
  • Quantity Needed
  • Billing/Shipping Address

How can I update or modify an order if needed?

If you need to modify your order, reply to the confirmation email with your case number for the fastest response.

What if I decide to cancel my order?

Send an email to secorders@frontsteps.com and reference the case number pertaining to those items. You may be subject to charges per the return policy.

When can I expect to receive tracking information for a shipment?

Generally, within 5 –7 business days of the date your order was received.

How do I place a new order?

No order method receives preference over another. All orders are tracked in one internal system. Many clients prefer the convenience of email: secorders@frontsteps.com.

How can I track the progress of my order?

Order confirmations are sent to the person who submitted the order. If you represent an HOA or COA and a security installer, dealer, or management company that completed the order on your behalf, please contact them for details. If you submit the order directly you will receive a confirmation email from secorders@frontsteps.com.

When will I receive updates on my order?

All orders submitted prior to 8:00 am MST Monday thru Friday are processed and shipped the same day. We will contact you if any item in your order is backordered.  Tracking information is available upon request.

Why is my order delayed?

  • Do you have any outstanding balances?
    • Per company policy, we will not send new equipment if your organization has outstanding balances with FRONTSTEPS. Contact the FRONTSTEPS billing team at billing@frontsteps.com if you have questions about the status of your account.
  • Orders may also be held up due to shortages of equipment.

Which organization will the shipping information come from?

Most hardware is shipped through FedEx and UPS. Custom access devices are often shipped directly from the manufacturer, and you may receive delivery notifications and package labels referencing the manufacturer’s brand when your orders are shipped.

Where can I find the tracking number for my shipment?

To request your tracking number, Contact secorders@frontsteps.com and reference your case number and /or your confirmation number.

Is my device available?

You may experience temporary delays in hardware deliveries due to ongoing supply constraints.

No longer supported:
DTek Devices (all models impacted)

If your desired equipment is on the list above, contact your security dealer or FRONTSTEPS to evaluate alternatives or set a viable timeline for delivery and installation of backordered items. 

Are special orders affected by supply chain shortages?

Yes. Special orders typically take 6-8 weeks for deliveryHowever, some special orders can take up to 12 weeks 

What is considered a special order?

Special orders include, but are not limited to the following:  

  • Custom Guest Passes  
  • Transponders  
  • Barcodes  
  • Windshield and Headlamp Tags  
  • Key fobs  

When is a special order fulfilled?

An authorized party from your organization must respond to the email from secorders@frontsteps.com quoting the price for your special order and confirm the purchase. Orders will not be sent to the manufacturer until we receive client approval. 

How can we optimize your business?

Talk to sales and learn how we can support your needs.